WHAT TO DO ONCE YOUR MILK KEFIR GRAINS ARRIVE
Once you receive your milk kefir grains from us, it’s important to get them fermenting as soon as possible. If you are unable to do that right away, ensure you activate them before the use by date stated on the packaging. Your order will contain 5-15g of milk kefir grains. This is enough to make 250-750ml of milk kefir. Don’t worry though; the culture grows pretty fast so you will be making much more in no time at all.
MILK AND METAL
You will often hear that you should not use metal utensils while making milk kefir. Although this holds some truth, it has been greatly exaggerated! Milk kefir gets very acidic, if left in contact with metals for long periods of time, in theory it could degrade and rust the metal. That metal would then end up in the milk kefir and eventually in you. However, using a stainless steel strainer/sieve or spoon while making milk kefir will not cause any problems. The contact time between the metal utensils and milk kefir will always be very short. Never leave anything metal in contact with milk kefir for long periods of time.
FERMENTATION JAR
You will need something to ferment your milk kefir in. We recommend using something glass. Glass is much easier to clean and keep sterile. Plastic tends to degrade over time and is prone to scratches which can harbour unwanted bacteria. Plastic also carries a risk of chemical contamination from the materials contained inside of it such as bpa. A glass kilner style jam jar is perfect to use.
STRAINER/SIEVE
You will need a strainer/sieve.
JAR COVER
You will also need something to cover your jar. We recommend paper kitchen towels as they are easy to discard and replace. You can also use a muslin cloth or similar if you wish. Rubber bands also come in handy to secure the cover to the jar. You can also remove the rubber seal from the lid of any swing top jar (such as the kilner jars supplied in our kits). With the seal removed you can close the lid while still allowing airflow during fermentation.
GLASS/PLASTIC MEASURING JUG:
You will need something you can stir your milk kefir with.
WHAT KIND OF MILK SHOULD I USE?
We recommend organic dairy milk for the very best kefir. Cow and goats milk works best. Using whole milk will produce a thick, creamy kefir. Semi skimmed and skimmed milk still produce kefir, but the consistency is much thinner. Experiment with different kinds of milk to find what you enjoy the most. You can also use raw milk to produce kefir. Using raw milk can carry some risks, so we recommend you do some research on raw milk before making kefir from it. You can read more about using raw milk here. Although some people have had some success with non-dairy milk alternatives such as rice or coconut milk, milk kefir grains do not thrive in non animal based milks (see below on using coconut milk). If you have problems with dairy, we suggest you try water kefir grains as a dairy-free alternative.
DO I HAVE TO USE ORGANIC MILK?
No, milk kefir will ferment any type of dairy. We choose to use organic milk with our grains as we believe organic is better. However, if you do not believe that to be the case, you are free to use whatever type of milk you wish while making your own kefir.
ACTIVATION:
You will need to activate your organic milk kefir grains; this is to revive them from the shipping process. Place your grains into 250ml of milk and cover your jar. Please use 250ml of milk for the activation of the grains whatever size you have purchased from us (er: 5g/10g/15g). Leave them for up to 48 hours at room temperature (18 Celsius) until the milk separates. This can sometimes happen within 24 hours and occasionally can take longer than 48 hours. If the milk does not separate within 48 hours, repeat the process with fresh milk. For some reason, the milk can refuse to separate. If that is the case, keep changing every 48 hours. Look for indications the milk is starting to thicken, or a crust-like layer is forming on the top of the milk, indicating the grains are active.
Once/if the separation has occurred, stir the mixture very well, so that no separation is visible. Strain out the milk kefir grains and discard the milk. Often, you will need to stir the milk as it is going through the strainer to help aid it passing through. Your grains are now activated. Once grains are activated, you can increase the volume of milk to the intended amount. For example, if you purchased 15g of milk kefir, increase the milk to 750ml.
Please note: We write basic guidelines for activation. However, as you are working with a living product, it’s hard to predict how quick milk kefir grains will recover. Usually, it is within 2 days, sometimes it is a week or two. Ensure your grains are always at 18 degrees or above during activation (especially during the winter). We promise they will work. Sadly, all we can offer in terms of advice is that patience is required. If after 2 weeks, your grains still no signs of change. Please contact us for a replacement.
Once activated, it is normal for grains to produce poor quality kefir for the first week or two. Often it is very watery or very sour. This is normal, the kefir is still fine to consume. This happens due to the grains still settling into a new environment and recovering from shipping. We urge you to continue with the daily fermentation process listed below. In time your grains will produce great kefir (usually within 1-3 weeks).
EXAMPLE OF THE ACTIVATION PROCESS:
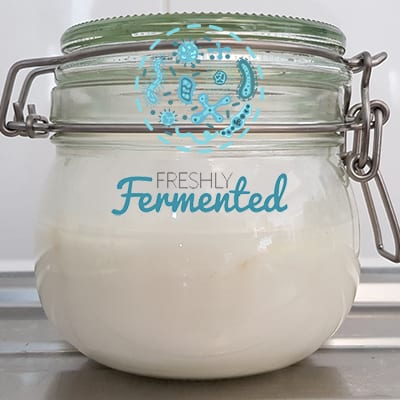
We took 5g of our organic milk kefir grains and left them sealed at room temperature for 5 days to replicate a typical shipping scenario. We then placed them into 250 of organic whole milk. Please note that your own results may vary. This should however be a useful indication if the process mentioned above working as expected.
48 hours have passed. Very little has changed with the milk. Strain the grains out, discard the milk and put the grains into 250ml of fresh milk.
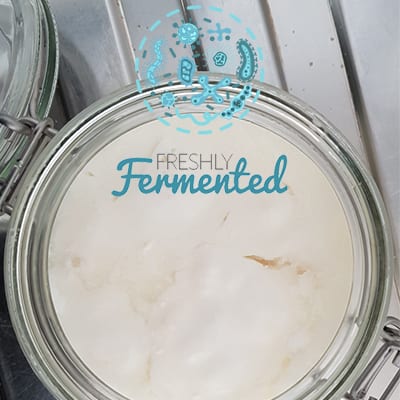
72 hours have passed. The milk is showing signs of thickening and a crust like layer has formed on the top layer of milk. Leave the grains for another 24 hours in the same milk.
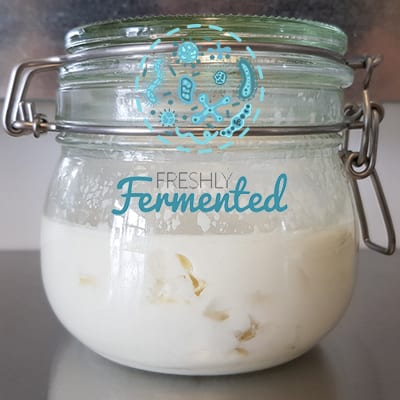
96 hours have passed. Patches of clear liquid (whey) can be seen in the milk. This is what we refer to as separation. The milk kefir is now ready. Strain the grains out again keeping back the kefir liquid for consumption. The grains are now fully activated.
THE FERMENTATION PROCESS:
Once activated, place your grains into 250ml of milk per 5g of milk kefir grains and cover your jar. If possible, try to stir your milk kefir mixture every 6 hours, at the very minimum, every 12 hours. You are looking for the consistency of the milk to change. Kefir never gets as thick as yoghurt. The ideal consistency is that of single cream. The time it takes for the texture to change depends greatly on the temperature the room in which the milk kefir is fermenting in. Generally, in room temperature (18 celsius), it will take 24 hours for this to happen. During warm summer months, this can happen much faster, and in winter months much slower. As the milk kefir grains begin to grow in size, the time it takes to ferment will also decrease. Try not to over ferment your milk kefir; you can read more about over fermentation here. Never leave any fermenting product in direct sunlight. This can lead to unwanted bacteria and pathogens forming. Once your milk kefir is ready, stir it well and strain the kefir liquid out into a separate jar. It can take a little work to get the liquid through a sieve. Once all the kefir is strained and your left with the milk kefir grains, place them back into the now empty jar. You can now repeat this process with fresh milk. People ask how often they need to clean their fermentation jar. We tend to use a clean jar each time ourselves here at freshly fermented to keep our kefir making process as hygienic as we can. However, many of our customers tend to clean their fermentation jars on a weekly basis. You can keep your kefir in the fridge for up to 30 days. We tend to prefer the taste of our kefir chilled here, but you can drink your kefir right away if you wish. During the warm summer months, it can be very difficult to successfully ferment milk kefir. Often, the grains ferment the milk too fast. The kefir separates much quicker than usual leaving you with a watery, sour tasting kefir. We get many enquiries during the summer on the best way to deal with this problem. Our recommendation is the cold fermentation of milk kefir method. Read more here.
INCREASING THE AMOUNT OF MILK USED:
Milk kefir grains will grow pretty fast. A good rule of thumb is to use 1 tablespoon (approx 15g) of milk kefir grains per litre of milk once you have enough grains to use that much milk. To begin with, keep an eye on your grains and once you see they have grown, or are over fermenting the milk kefir too fast, increase the amount of milk used. As a rough guideline, you should be able to double the amount of milk used every 2-3 weeks. Making kefir is not an exact science, lots of environmental factors come into play, much of fermentation is a trial and error process.
WHY IS MY MILK KEFIR NOT THICKENING?
We tend to find that milk kefir can take a little while to settle into a new environment and recover from shipping. This usually takes 2-3 weeks. During that time, you might notice that you get a crust on the milk at the top around the grains. Often only around a third of the milk will thicken around the grains. Underneath that crust, the milk can still be very watery. Please note that the kefir can still manage to split and separate at this stage. That can happen very quickly during the first few weeks, which can be frustrating. If this happens just to stir the kefir well. Once stirred, the overall kefir consistency can be quite thin, and the taste can sometimes be a little sour. This can lead to people assuming the grains are not working correctly. However, this is a normal part of the initial starting process. Once the grains have settled into the new environment in your home, you will find the milk separates much slower, and you will have a better consistency of kefir fermenting. You will need to be patient during this process. The grains will settle in time. The kefir produced during this initial phase can still be used as per normal, it just does not have the same thickens and taste it will have in the time ahead of its journey with you, but still contains all the beneficial bacteria as normal kefir does. Remember milk kefir grains are a living product. As with any living product, they need care and nurturing to produce the best quality product possible.
MY GRAINS LOOK SMALL AND NOT LIKE THOSE IN THE PICTURES!
In order to be cost-effective, we break down and compress our milk kefir grains for the shipping process. It will take several weeks of fermenting for your grains to reform into clusters like those seen in our pictures. Do not worry though, this in no way affects the milk kefir fermentation process. I’ve followed these steps, and nothing is happening. Milk kefir grains are very hardy. It’s unlikely they would have died during the shipping process. Dead grains become yellow with a brown/orange tint; it is very easy to tell if the grains have died. If you are experiencing problems, please do get in touch with us. Don’t worry, were always more than happy to resend more milk kefir grains if required.
FINDING IT HARD TO DRINK MILK KEFIR?
People can often find milk kefir very sour and difficult to drink. Most people prefer to carry out a second fermentation process with milk kefir to mellow out and mask the overall sour taste. You can find out more about carrying out the second fermentation here.
WHAT DO I DO WITH MY EXCESS MILK KEFIR GRAINS?
Excess grains can either be discarded, or frozen for later use. To freeze them, simply put them in a little milk and a suitable container and put them into the freezer. They will keep in the freezer for 6 months. Or more. You will need to reactivate them again once defrosted. You will often find it can take a week or so for them to start producing good kefir again. Some people have had success dehydrating milk kefir grains and then rehydrating them again at a later date in milk. We however recommend you freeze them here at Freshly Fermented.
SHOULD I RINSE OR WASH MY MILK KEFIR GRAINS?
No, it is very important that you don’t. Milk kefir grains grow a natural protective layer around themselves known as kefiran. This layer is easily disturbed by rinsing or washing them. Doing so can affect not only the quality of the kefir produced, but also damage the milk kefir grains by making them more prone to mould and other problems.
CAN I USE COCONUT MILK?
Yes, it is possible to use coconut milk. However it must be of premium quality. Generally, most coconut milk brought in supermarkets is not suitable. What happens is that eventually the grains will die due to the low fat content found in concentrates used and other things put into the coconut milk to help preserve it. The best coconut milk we can recommend is Grace coconut milk or Biona coconut milk it needs to be 100% pure with a high fat content. Generally over 10% fat to work properly with milk kefir grains. We ask that you do so at your own risk. We also advise you have spare grains as a backup to use if things do go wrong.
Find out more about using plant-based milks here.
GOING ON HOLIDAY?
If you’re planning on going on holiday, you’re probably concerned about leaving your milk kefir grains unattended. Don’t worry though. Place them in a fresh batch of milk and pop the jar into the fridge. They will keep like this for 2-3 weeks.


